When you’re considering updating your kitchen or bathroom, one of the most important aspects is the cabinetry. Learning how to install cabinets can feel overwhelming at first, but with the right approach and preparation, it’s completely achievable. At Millennium Designs, we understand how much a beautiful set of cabinets can impact the functionality and look of your space. That’s why we want to walk you through this process in a way that makes sense, step by step, so you feel confident moving forward with your project.
Why Cabinet Installation Matters
Cabinets aren’t just storage, they define the flow and feel of a room. Proper installation ensures everything is aligned, secure, and built to last. When cabinets are positioned correctly, your countertops, appliances, and everyday tasks all fit together seamlessly. Beyond functionality, well-installed cabinets also bring a polished look that ties the room together.
Preparing for Cabinet Installation
Before we begin placing cabinets, preparation is key. Taking time upfront saves you from unnecessary adjustments later. Here are a few critical steps:
1. Gather Tools and Materials
You’ll need basic tools such as a drill, level, tape measure, clamps, stud finder, screws, shims, and a pencil for marking. It’s also a good idea to have a helping hand available since cabinets can be heavy and difficult to position on your own.
2. Check the Walls and Floors
Rooms are rarely perfect squares. Floors may slope slightly, and walls can bow. Use your level to check for these imperfections. If you notice inconsistencies, don’t worry, shims will help correct the alignment during installation.
3. Mark Reference Lines
Measure from the floor and mark a level line where the base cabinets will sit. Do the same for upper cabinets, typically 18 inches above the countertops. These reference points keep everything in order as you work.
Step-by-Step Process
Once preparation is done, it’s time to install. Here’s how to move through the process methodically:
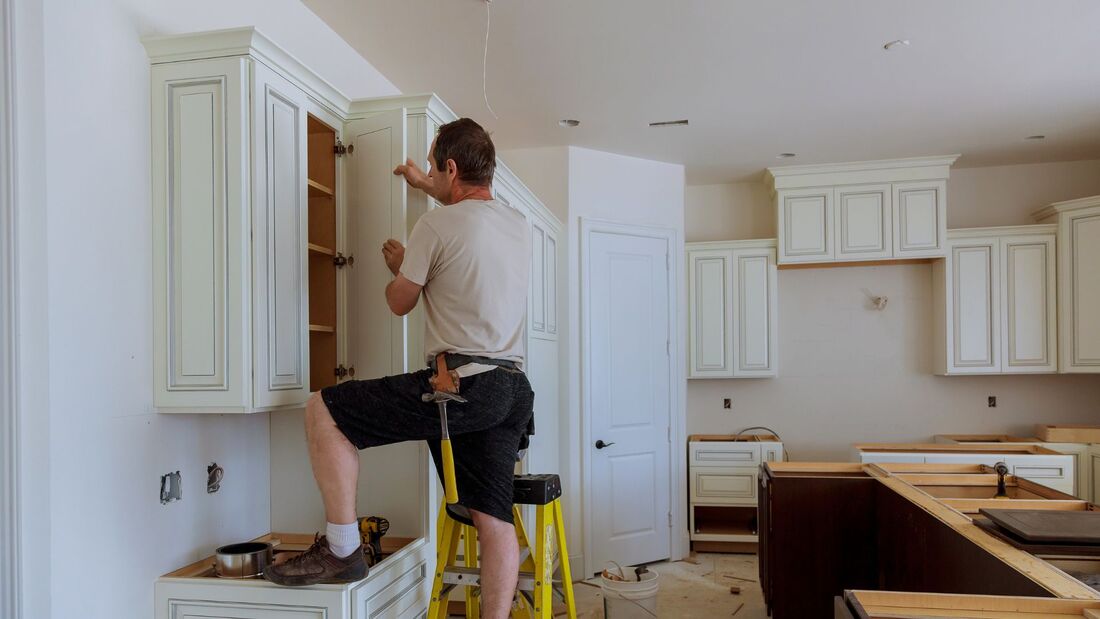
Step 1: Install the Upper Cabinets First
Starting with the upper cabinets makes sense because it prevents you from reaching over base cabinets later.
- Locate wall studs with a stud finder and mark them.
- Screw a temporary ledger board into the wall along your level line for support.
- Position the first cabinet at the corner and secure it to the studs, making sure it’s level and plumb.
- Work outward, connecting each cabinet with clamps and screws while checking alignment frequently.
Step 2: Position the Base Cabinets
After the uppers are secure, move on to the base cabinets.
- Begin in the corner or with the cabinet beside your sink or stove.
- Set the cabinet in place and check for level. Use shims underneath if the floor is uneven.
- Secure the cabinet to the wall studs, then continue with the next one, fastening each unit to its neighbor as you go.
Step 3: Align and Secure All Cabinets
Once all base cabinets are in place:
- Check again for level across the tops. This is important for countertop installation later.
- Make any final adjustments with shims.
- Tighten screws to ensure cabinets are secure and connected properly.
Step 4: Add Finishing Touches
Cabinets look their best once doors, drawers, and trim are added. Install handles or knobs according to your preference. Use filler strips where cabinets meet walls if needed, and attach toe kicks along the base for a polished look.
Common Challenges and How to Handle Them
Even with careful planning, some challenges can pop up. Here are a few common issues and practical ways to handle them:
- Uneven floors or walls: Use shims to even things out. Don’t try to force cabinets into place, it could cause misalignment.
- Heavy cabinets: Always ask for assistance. Holding a cabinet steady while driving screws is nearly impossible alone.
- Gaps near walls: Filler strips or trim pieces give a seamless finish. They make the installation look custom to your space.
Tips for Success
To make the process smoother, keep these tips in mind:
- Measure twice before cutting or drilling. Precision upfront avoids frustration later.
- Use a high-quality level for accuracy. Even small misalignments can be noticeable in cabinetry.
- Secure cabinets to studs, not just drywall. This ensures strength and durability.
- Clamp cabinets together before screwing them in. This keeps the faces flush and uniform.
- Take your time with the finishing touches. Hardware placement and trim details make a big difference in the final appearance.
Benefits of Installing Cabinets Properly
A correct installation goes beyond aesthetics. Here are some reasons why this process is worth doing right:
- Durability: Properly mounted cabinets withstand years of use without sagging or shifting.
- Efficiency: Correctly aligned cabinets make meal prep, storage, and daily activities easier.
- Style: Well-fitted cabinets elevate the overall look of your kitchen or bathroom.
- Resale value: A home with quality cabinetry often appeals more to potential buyers.
When to Consider Professional Help
While many homeowners choose to install cabinets themselves, there are times when professional assistance makes sense. If your project involves custom cabinetry, complex layouts, or significant adjustments to plumbing or electrical work, calling in experts ensures the job is done correctly and efficiently.
At Millennium Designs, we’ve helped countless homeowners achieve the perfect balance of beauty and practicality in their cabinetry. If you’d rather not handle the installation on your own, we’re here to help make the process smooth and worry-free.
Caring for Your Cabinets After Installation
Once your cabinets are installed, maintaining them ensures they stay beautiful for years:
- Clean gently: Use a soft cloth and mild soap. Avoid harsh chemicals that can damage finishes.
- Check hardware regularly: Tighten screws on hinges or handles as needed.
- Watch for moisture: Especially in bathrooms or near sinks, dry cabinets promptly if water spills.
- Re-seal wood finishes: Depending on the material, occasional resealing may be needed to preserve the look.
Final Thoughts
Now that you have a clear idea of how to install cabinets, you can see that the process is manageable with the right preparation and tools. Whether you decide to handle it yourself or prefer assistance from professionals, the key is ensuring your cabinets are aligned, secure, and finished with care. At Millennium Designs, we take pride in offering cabinetry solutions that bring long-lasting style and functionality to your home.